Spring Cloud Config Server is used to provide server-side and client-side support for externalized configuration in a distributed system. So when you have multiple microservices, and you want to easily control the configuration for all of them at one go - you’ll mostly be looking at Spring Cloud Config Server.
So how do we do this?
We will create a git project which contains all your properties files for the multiple microservices that you have (easy enough). We then create one spring boot application whose only role will be to be a micro service pointing to these files as it acts as a Spring Cloud Config Server. All the other microservices(the clients) can be configured to get the required properties from the Config Server.
This isn’t too tricky, and is actually easy to implement. In the below steps, I will walk you through how you can set this up in your project and even configure profiles for your microservices.
Step 1) Create the Spring Cloud Config Server
1.1) Create a Sprig Boot App
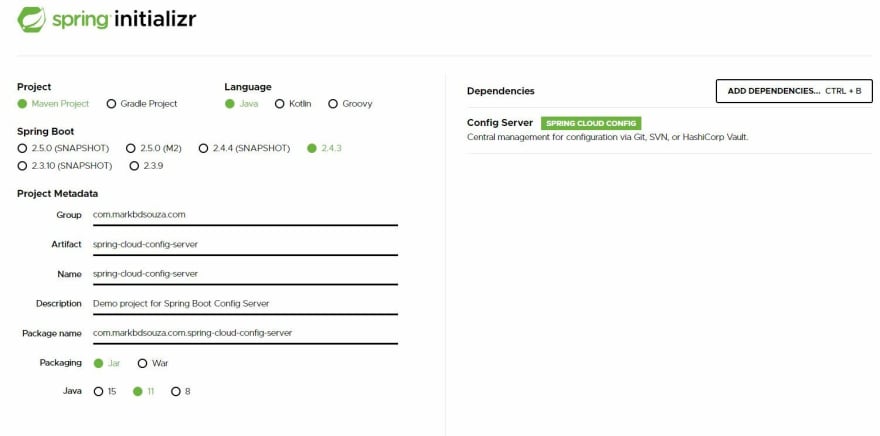
Lets start off creating our Spring boot application using start.spring.io I am using the Spring boot version 2.4.3
 ]
]
Make sure the dependency is Config Server and not Config Client. Hit generate and you’re done.
1.2 Update the Main Class
Open the project with your IDE.
Open up your main Spring boot class with @SpringBootApplication and add @EnableConfigServer as well (Imported from import org.springframework.cloud.config.server.EnableConfigServer)

1.3 Create a git repo with the properties file
Create a new folder where you will hold your config file and do a git init on that folder.
now create the property file that you will map to your config server. We will be naming our microservice : microservice-one File Name : miroservice-one.properties
|
|
Now add and commit your changes. Else the spring boot app will not read it
Note: you can also use yml files here
1.4 Update application.properties
Copy the path of your new git repository and paste it in your application.properties file.
The config server is generally set to port 8888. Windows users should make sure you are using the / and not \ when copying the path.
1.5 Test it out
Launch the application and navigate to : http://localhost:8888/microservice-one/default
where microservice-one is the name of the file we have created.

As you can see, the property you have mapped is present. With this we are done setting up our basic Spring Cloud Config Server
Step 2) Create the Client Microservice
Next up is fetching the property from this config server in an independent microservice. In our case microservice-one
2.1 Create a Spring Boot App
Back to start.spring.io with Spring boot version 2.4.3
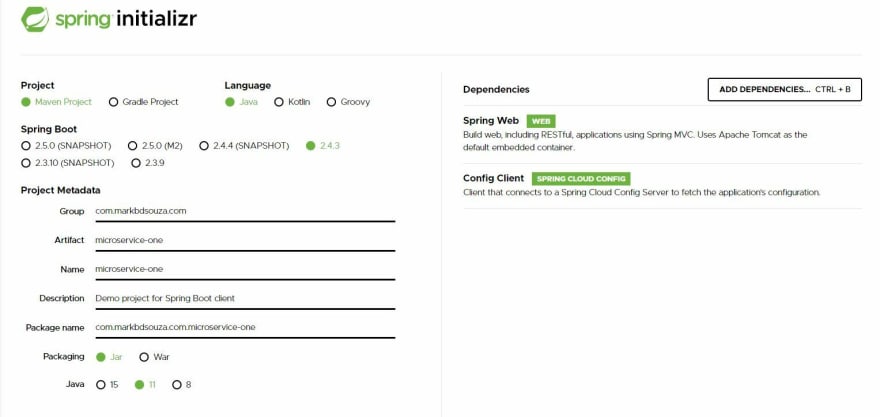
Go ahead and generate the app.
2.2 Update application.properties
Open the app with your IDE and its time to do some configuration
Here, we are basically importing the config server and providing the URL for the microservice. We can also mention the backup value in case for some reason we cannot find the config server.
2.3 Create a configuration class
Let us now create a Class that can read the properties from the config server
|
|
Here we are setting the Configuration Properties annotation with the name of the file. This Class will automatically get set when the spring boot application is run and it would set the value that is present in the Spring Cloud Config Server
2.4 Create a Rest controller
Now lets expose an endpoint which returns the config value
|
|
Here we are auto-wiring the configuration class we created in the previous step and setting it at the ‘/endpoint’ endpoint.
2.5 Test it out
Run the microservice-one spring boot application. and go to the defined controller end point
http://localhost:8080/endpoint

With these simple steps you are DONE! I hope it doesn’t seem as challenging as you thought it would be !!
Step 3) Implementing Profiles
Now the only way to enhance this and make it really useful is having using different profiles. Depending on the environment, we usually have different properties file being used. So let’s see how we can add different profile related configuration to our server and have it reflected in our client
3.1) Commit additional properties files in git
Now create additional application.properties files. One for dev and one for qa. File Name: microservice-one-dev.properties
|
|
File Name: microservice-one-qa.properties
|
|
make sure you do a git add and commit
That’s all you need to add new properties files. You don’t need to touch the spring boot application we created as such. Just check in the files created.
3.2) Test the profile related server endpoints
Earlier we navigated to
http://localhost:8888/microservice-one/default
Now, 2 new endpoints open up in our 8888 port.
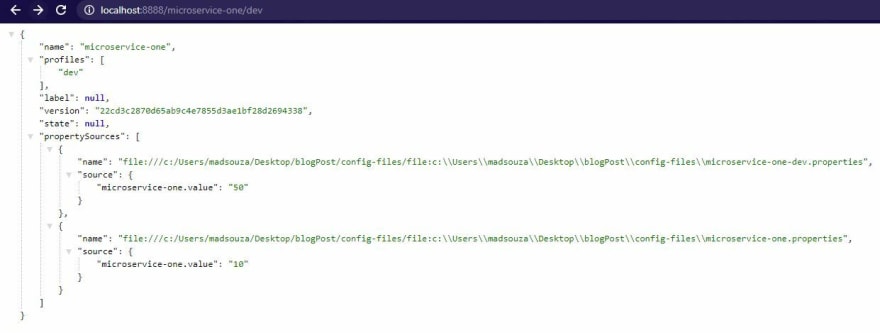
http://localhost:8888/microservice-one/dev
 ]
]
http://localhost:8888/microservice-one/qa
 ]
]
Note that for both of these, we actually see the default value available as well.
3.3) Update the micro service
All you really need to do is update the application.properties file of microservice-one and set the profile you want to use
spring.profiles.active=dev
The overall file would now look like
3.4) One last Test
Now if we hit the same endpoint we did earlier : http://localhost:8080/endpoint
 ]
]
How quick and easy was that? You can very easily set it up for other profiles as well. I hope you’ve found this useful!!
Reference https://dev.to/markbdsouza/spring-cloud-config-server-step-by-step-14fd