1. Overview
1. What is SkyWalking?
Application performance monitoring tool for distributed systems, designed for microservices, cloud-native architectures and container-based (Docker, K8s, Mesos) architectures. Provides distributed tracing, service grid telemetry analysis, metric aggregation and visualization all-in-one solution.
Official website address: http://skywalking.apache.org/
2. SkyWalking features
- Multiple monitoring tools, language probes and
Service Mesh - Multilingual automated probes,
Java,.NET CoreandNode.JS - Lightweight and efficient, no need for big data
- Modularity, with multiple mechanisms for UI, storage, and cluster management available
- Alarm support
- Excellent visualization scheme
3. Overall structure
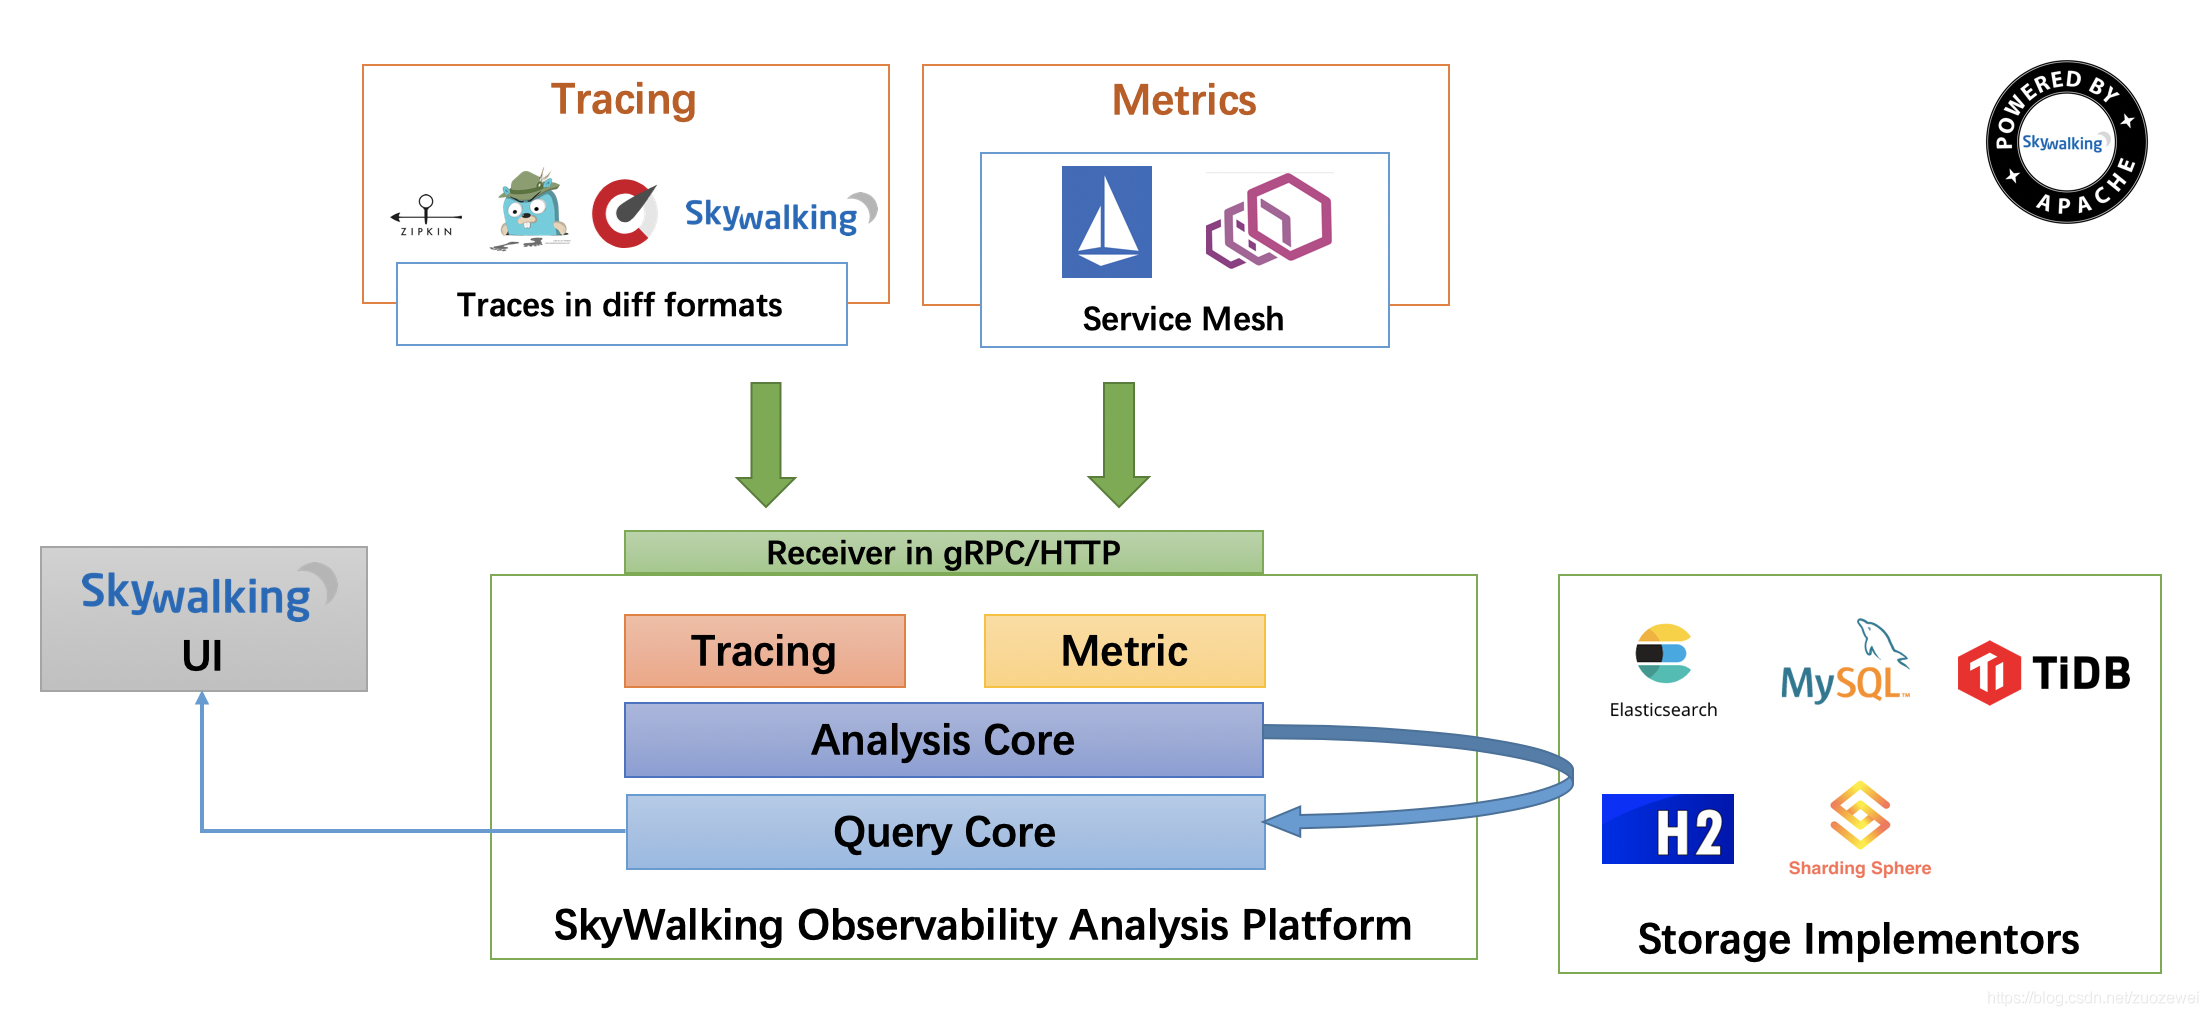
The entire architecture, divided into four parts: top, bottom, left and right.
In order to make the description simpler, we discard the Metric metrics related and focus on the Tracing link related functions.
- Top part Agent: responsible for collecting link information from the application and sending it to SkyWalking OAP server. Currently, it supports Tracing data information provided by SkyWalking, Zikpin, Jaeger and so on. And what we currently use is that SkyWalking Agent collects
SkyWalking Tracingdata and passes it to the server. - The lower part
SkyWalking OAP: responsible for receiving the Tracing data information sent by Agent, then analyzing (Analysis Core), storing to the external storage (Storage), and finally providing the query (Query) function. - Right part Storage : Tracing data storage. Currently, ES, MySQL, Sharding Sphere, TiDB and H2 are supported. The main consideration is that the SkyWalking development team’s own production environment uses ES as the main storage.
- Left part
SkyWalking UI: responsible for providing console, viewing links, etc.
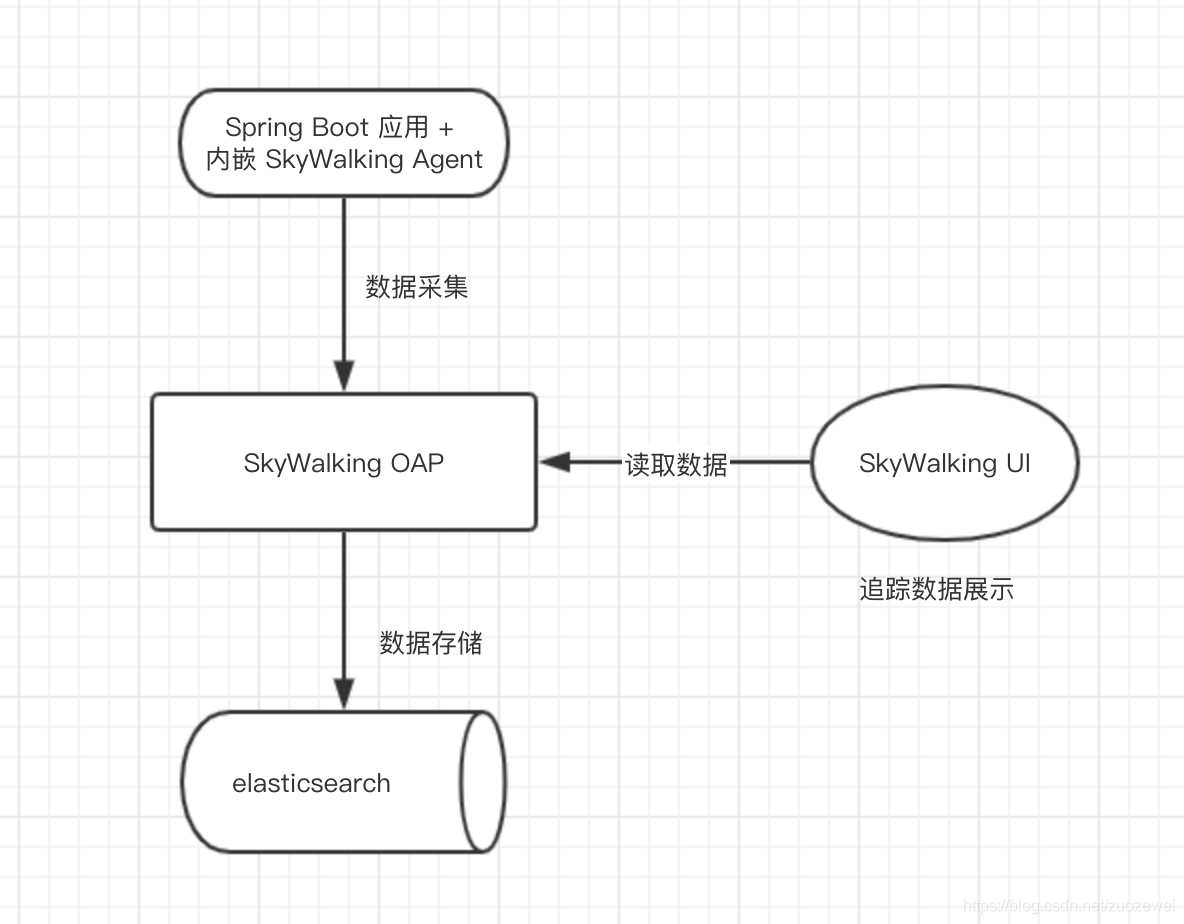
A simple overview of the principle is shown in the following figure.
2. Build skywalking
1. Environment preparation
- Mkubernetes version: 1.18.5
- Nginx Ingress version: 2.2.8
- Helm version: 3.2.4
- Persistent storage driver: NFS
2、Deployment with charts
This article is about how to use Helm Charts to deploy SkyWalking to a Kubernetes cluster, the related documentation can be found in skywalking-kubernetes
Four approaches are currently recommended.
- Start a local helm repo using the helm serve provided by helm 3
- deploy with a local chart file
- Use the repo feature provided by harbor
- Deploy directly from the official repo (not available yet)
Note: The chart of skywalking has not been submitted to the official repository yet, please refer to the first three ways to deploy first
2.1. Download the chart file
You can deploy skywalking directly using local files, follow the steps above to download the skywalking chart and then deploy it directly using the following command.
2.2. Define the existing es parameter file
Modify values-my-es.yaml:
|
|
2.3, helm installation
After the installation was completed, we verified the following installation.
3. Using Skywalking Agent
There are three ways to use agent in Java
- Use the official base image provided
- Build the agent package into an existing base image
- mount the agent in sidecar mode (recommended)
1. Use the official base image
Check the official docker hub provided base image, just need to build your service image is From this image, directly integrated into Jenkins can be more convenient
2. Build the agent package into an existing base image
The reason for this approach is: the official image is a compact image, and openjdk, many commands may not have, need to install their own secondary, here omitted.
3. sidecar mode mount agent
Since the service is deployed in Kubernetes, the advantage of using Skywalking Agent in this way is that you don’t need to modify the original base image or rebuild a new service image, but mount the agent’s required files to the existing service image in sidecar mode by sharing the volume.
1. build skywalking agent image
Build it yourself, refer to: https://hub.docker.com/r/prophet/skywalking-agent
Build with the following dockerfile.
|
|
|
|
After the docker build is finished, just push it to the repository.
2. Using sidecar mount
The sample configuration file is as follows.
|
|
The above is the deployment.yaml file for mounting the sidecar, taking nginx as an example, the main way to mount the agent is by sharing the volume, first initContainers mounts the sw-agent-sidecar /vmskywalking/agent and cp the agent directory in the image built above to the /vmskywalking/agent directory, after that nginx also mounts the skywalking-agent volume when it starts and mounts it to the container’s /opt/skywalking /agent directory of the container, which completes the sharing process.
4. Transforming Spring Cloud Applications
1. docker package and push to the repository
Modify the dockerfile configuration to integrate the skywalking agent:
|
|
Once you’ve changed it, run maven package directly to package the project as an image.
Note that.
When k8s creates a Service, it creates the appropriate DNS entry. The format of this entry is
<service-name>. <namespace-name>.svc.cluster.local, which means that if the container only uses<service-name>, it will resolve as a local service to the namespace. For cross-namespace access, a fully qualified domain name is required.
2. Write the deployment script for the yaml version of k8s
Here I will use one of the services as an example.
|
|
Then you can run it directly, and it will be able to run the project all up.
5. Test Verification
When finished, you can go to SkyWalking UI to check whether the link collection is successful.
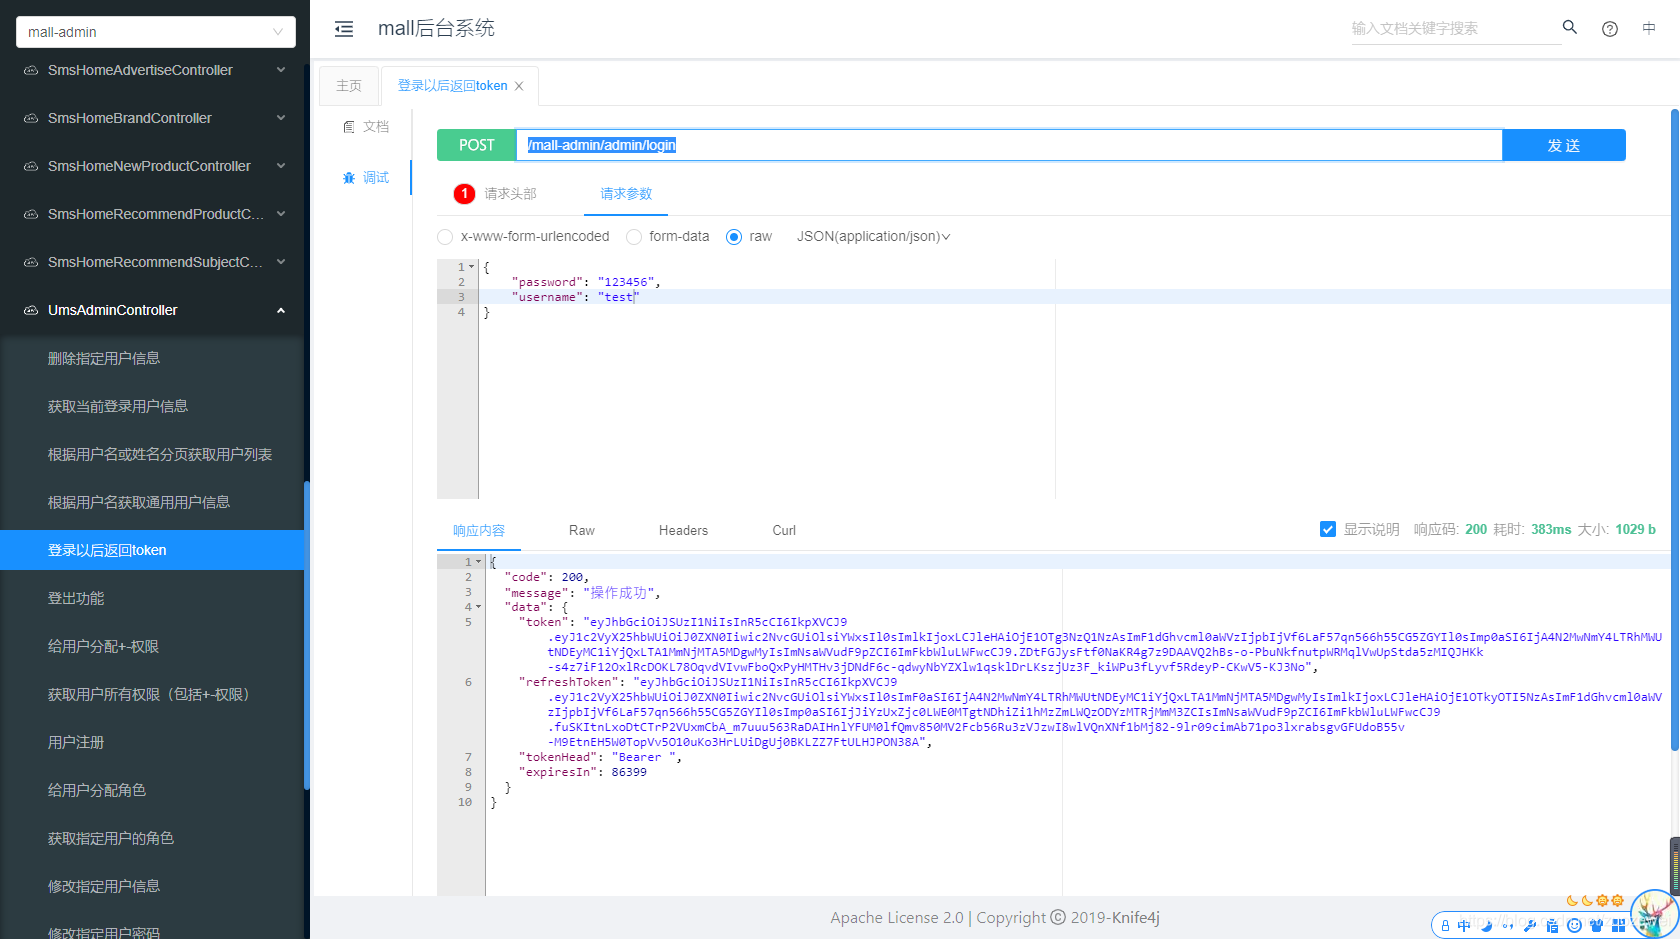
1. Test the application API
First, request the API provided by the Spring Cloud application, because we want to trace the link.
2. View SkyWalking UI interface
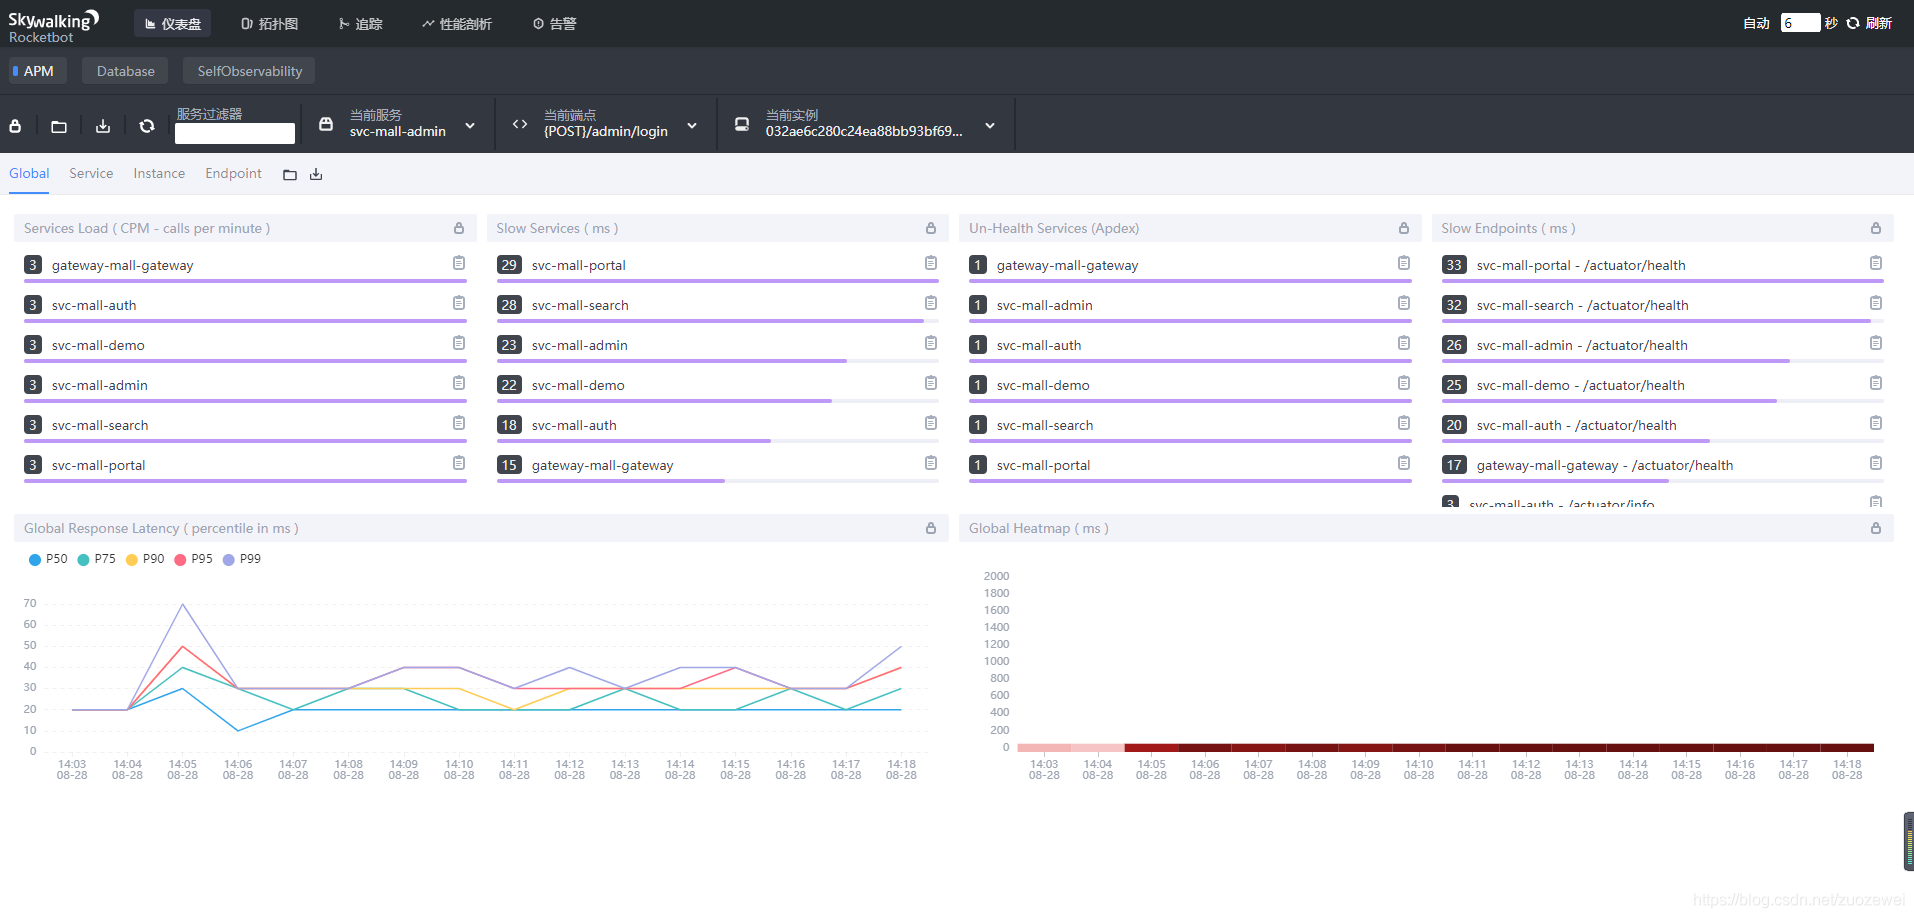
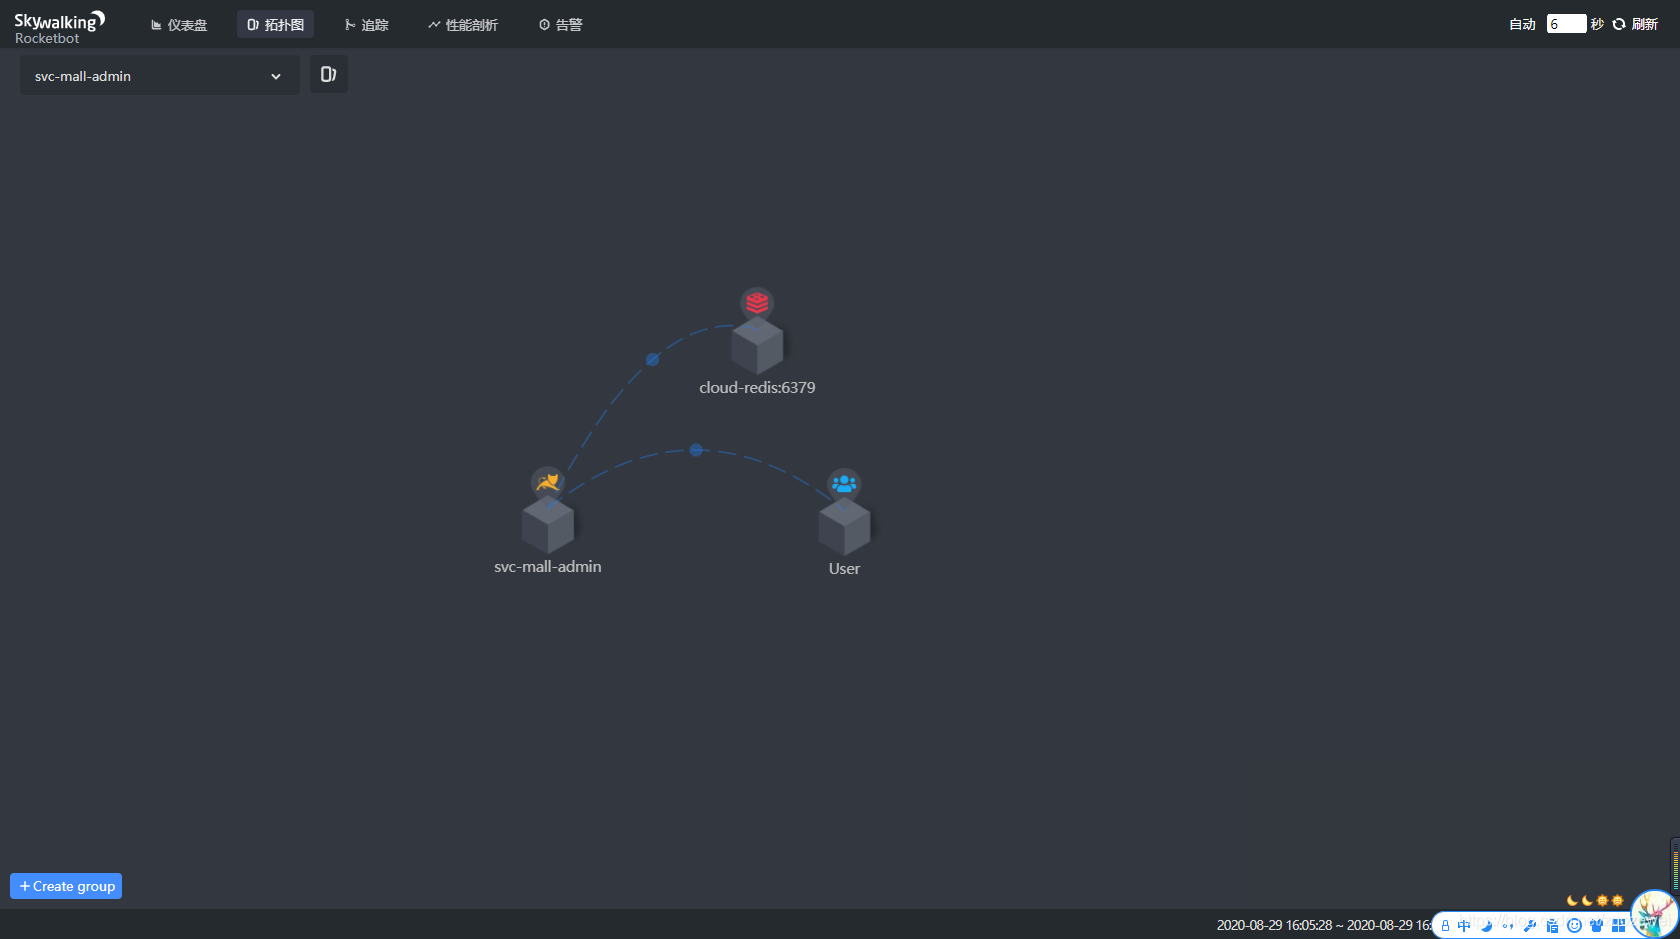
Here, we will see three very important concepts in SkyWalking.
- Service (Service): represents a series or group of workloads that provide the same behavior to a request. When using the Agent or SDK, you can define the name of the service. If you don’t, SkyWalking will use the name you define on the platform (say Istio). Here, we can see that the service for the Spring Cloud application is
svc-mall-admin, which is what we defined in the agent environment variableservice_name. - Service Instance: Each workload in the above set of workloads is called an instance. Like pods in Kubernetes, a service instance is not necessarily a process on the operating system. But when you’re using an Agent, a service instance is actually a real process on the OS. Here, we can see that the Spring Cloud application’s service is
UUUID@hostname, which is automatically generated by the Agent. - Endpoint: The path of the request received for a particular service, such as the URI path for HTTP and the class name + method signature for the gRPC service.
Here, we can see an endpoint of the Spring Cloud application for the API interface /mall-admin/admin/login.
For more information about agent parameters, please refer to https://github.com/apache/skywalking/blob/v8.1.0/docs/en/setup/service-agent/java-agent/README.md
Click the “Topology Map” menu to enter the interface to view the topology map.
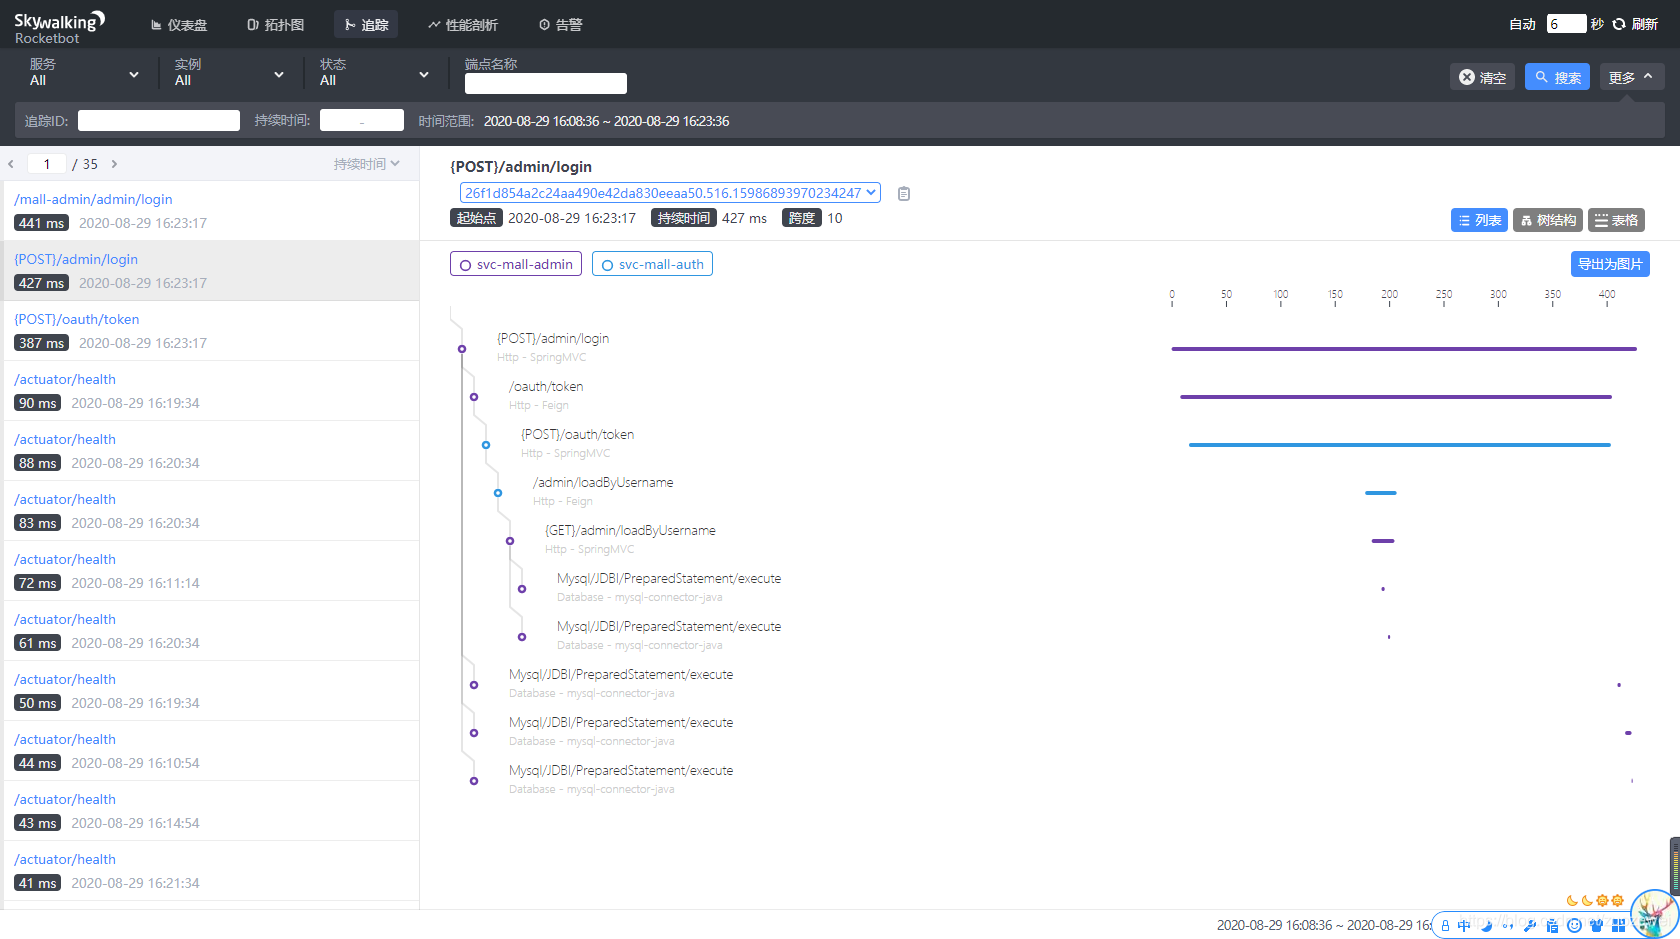
Click on the “Trace” menu to access the screen for viewing link data at
6. Summary
This article details how to use Kubernetes + Spring Cloud integration SkyWalking, by the way, call chain monitoring is an essential component in the current microservice system, distributed tracking, service grid telemetry analysis, metric aggregation and visualization is still quite useful, here we chose Skywalking, the specific reasons and details The specific reasons and details of how to play are not detailed here.
Source code for this article.
Reference https://xie.infoq.cn/article/9e5026e2237cc0d57fafa2d57