Today I want to talk to you about the monitoring function in Druid.
Druid database connection pool believe that many people have used, I feel that Druid is a more successful open source project Ali, unlike Fastjson has so many problems. druid has been better in all aspects, full-featured, easy to use, the basic usage will not say, today we look at the monitoring function in Druid.
1. Preparation
First let’s create a Spring Boot project. Add dependencies such as MyBatis as follows.
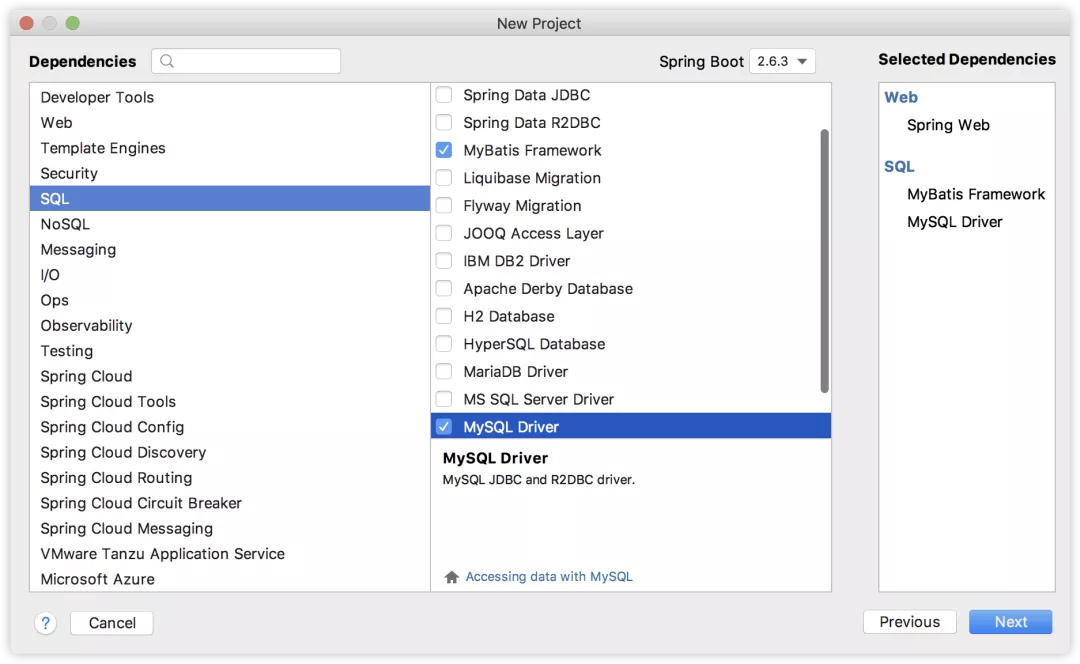
Choose MyBatis and MySQL driver to make a simple test case.
First, let’s connect to the database.
Create a User entity class and make a simple query case as follows.
|
|
UserMapper.xml is as follows.
|
|
A very simple test, not much to say.
Now the default database connection pool used by this project is HikariDataSource, which is the default database connection pool in Spring Boot, and it’s actually not bad.
2. Using Druid
Next we import Druid’s dependencies:
It’s easier to use the official starter directly.
Next, we configure WebStatFilter in application.properties, which is used to collect data from web-jdbc association monitoring.
|
|
We configure the first five on it, and the last three can be configured without. The meaning of each configuration is already listed in the code.
Next, open the StatViewServlet configuration, as follows.
|
|
Just configure the page address and configure the black and white list.
Note that the reset-enable property will be displayed even if it is set to false, the reset button will just not be reset by clicking it.
Okay, that’s it.
3. Testing
Next, we start the Spring Boot project for testing.
After the Spring Boot project starts successfully, first visit the following link.
http://localhost:8080/druid/login.html
At this point we will see the login authentication page as follows.
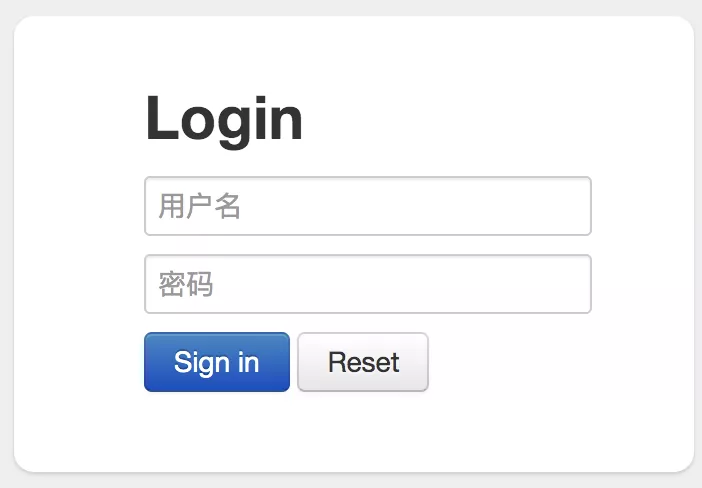
Enter the username/password we configured earlier (javaboy/123) to log in, and after successful login, you can see the following page.
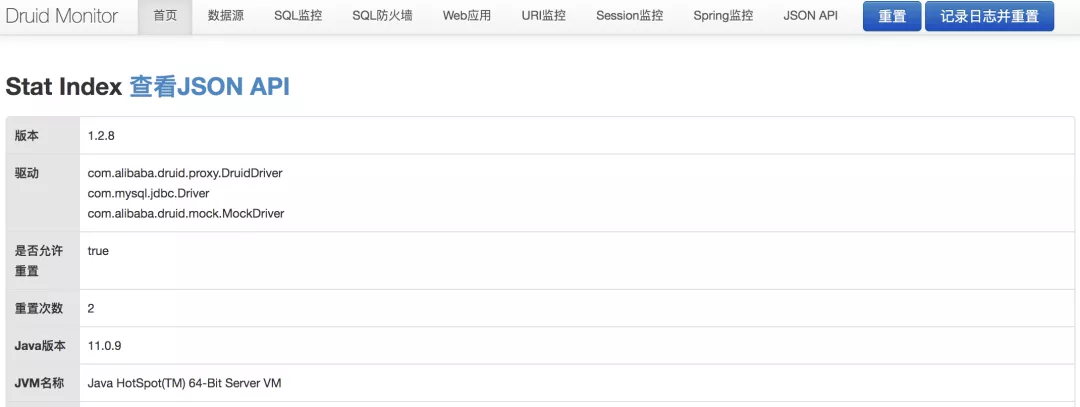
As you can see from the title bar, data source, SQL monitoring, SQL firewall and other functions are all available.
Next, we visit http://localhost:8080/user?username=aaa address and execute a SQL, after the execution is finished, let’s check the SQL monitoring.
As you can see from the title bar, data source, SQL monitoring, SQL firewall and other functions are all available.
Next, we request http://localhost:8080/user?username=aaa, which executes a SQL. After the execution, let’s check the SQL monitor.

As you can see, there is a monitoring record of SQL execution at this time.
Other monitoring data can also be seen, so I won’t list them all. If you think the data shown here is not intuitive and you want to draw your own HTML page, that is also possible. You can see the JSON rest Api for each monitoring item by clicking the JSON API at the end, and you can customize the view with these rest api.
4. remove ads
If you want to use this monitoring page directly, this one has Ali’s ads on it, as shown below. If this is the company’s monitoring backend, the ads will look awkward.

We might want to remove the ad, which is also easy.
First, after analyzing it, we found that the ad is built from a file called common.js, which is located in druid-x.x.x.jar!/support/http/resources/js/common.js Here, the common.js file has the following lines.
The buildFooter method is responsible for building the ads at the end of the page, and the buildFooter method is called in the init method.
So if you want to remove the ads, just don’t call the buildFooter method.
So our idea of removing ads is simple: write a filter to intercept requests to common.js, and then make a little modification, as follows.
|
|
As you can see, this filter is to intercept /druid/js/common.js requests, after intercepting, go to the file to read the common.js file, and then manually replace the this.buildFooter(); sentence on the line, and finally write the file out on the line.
Of course, remember to scan Filter in the startup class, as follows.
Reference
https://mp.weixin.qq.com/s/5rsknrXgizcaUEs7yufUBQ