1. Overview
In this tutorial, we’ll learn how to configure a default global security scheme and apply it as the default security requirement of the API using the springdoc-openapi library in a Spring MVC web application. Further, we’ll discuss how we can override these default security requirements.
The OpenAPI specification lets us define a set of security schemes for the API. We can configure the security requirements of the API globally or apply/remove them per endpoint.
2. Setup
As we are building a Maven project using Spring Boot, let’s explore the setup of the project. At the end of this section, we’ll have a simple web app.
2.1. Dependencies
The example has two dependencies. The first dependency is the spring-boot-starter-web. This is the main dependency to build the web app:
The other dependency is the springdoc-openapi-ui, which is the library that will render the documentation of the API in HTML, JSON, or YAML:
2.2. Application Entry Point
Once the dependencies are ready, let’s define the entry point for the application.
We’ll use the @SpringBootApplication annotation to bootstrap the app and the SpringApplication helper class to launch it:
3. springdoc-openapi Base Configuration
Once we have the Spring MVC configured, let’s look at the API semantic information.
We’ll define the default global security scheme and the API metadata by adding springdoc-openapi annotations to the DefaultGlobalSecuritySchemeApplication class. To define the global security scheme, we’ll use the @SecurityScheme annotation:
|
|
We’ve chosen an APIKEY security scheme type, but we could configure other security schemes, for instance, JWT. After defining the security scheme, we’ll add the metadata and establish the default security requirement for the API. We do this using the @OpenApiDefinition annotation:
|
|
Here, the info attribute defines the API metadata. Furthermore, the security attribute determines the default global security requirements.
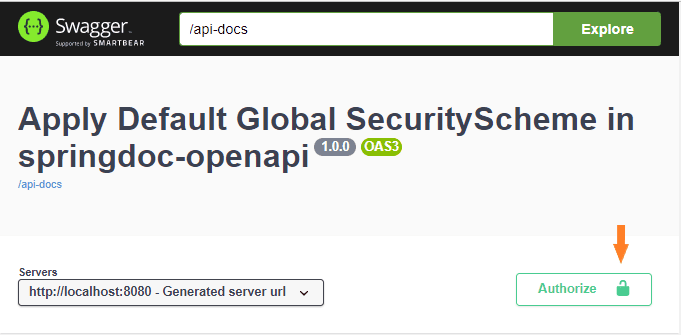
Let’s see what the HTML documentation will look like with the annotations. We’ll see the metadata and a security button that will apply to the whole API:
4. Controllers
Now that we have configured the Spring framework and the springdoc-openapi library, let’s add one REST controller to the context base path. To achieve this, we’ll use the @RestController and @RequestMapping annotations:
After that, we’ll define two endpoints or paths.
The first endpoint will be the /login endpoint. It’ll receive the user credentials and authenticate the user. If the authentication succeeds, the endpoint will return a token.
The other endpoint of the API is the /ping endpoint and requires the token generated by the /login method. Before performing the request, the method validates the token and checks if the user is authorized.
In summary, the /login endpoint authenticates the user and provides a token. The /ping endpoint receives the token returned by the /login endpoint and checks that it’s valid and that the user can perform the operation.
4.1. login() Method
This method won’t have any security requirements. Therefore, we need to override the default security requirement configuration.
First of all, we need to tell Spring that this is an endpoint of our API, so we’ll add the annotation @RequestMapping to configure the endpoint:
|
|
After that, we need to add semantic information to the endpoint. So we’ll use the @Operation and @SecurityRequirements annotations. The @Operation will define the endpoint and the @SecurityRequirements will define the specific set of security requirements that applies to the endpoint:
|
|
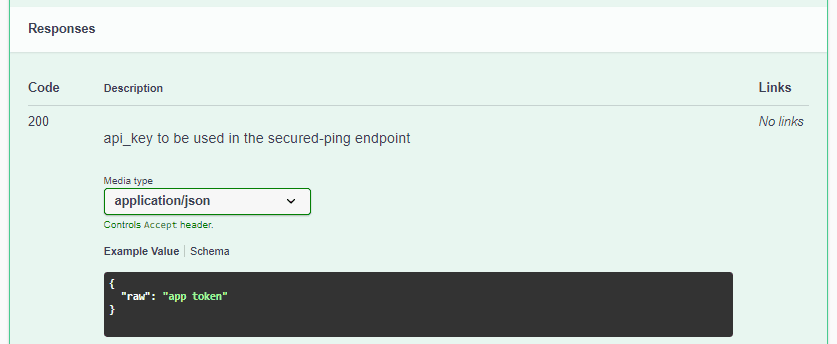
For instance, here’s the HTML documentation for the response with status code 200:
Finally, let’s see the login() method’s signature:
As we can see, the body of the API request receives a LoginDto instance. We also must decorate the DTOs with semantic information to display the information in the documentation:
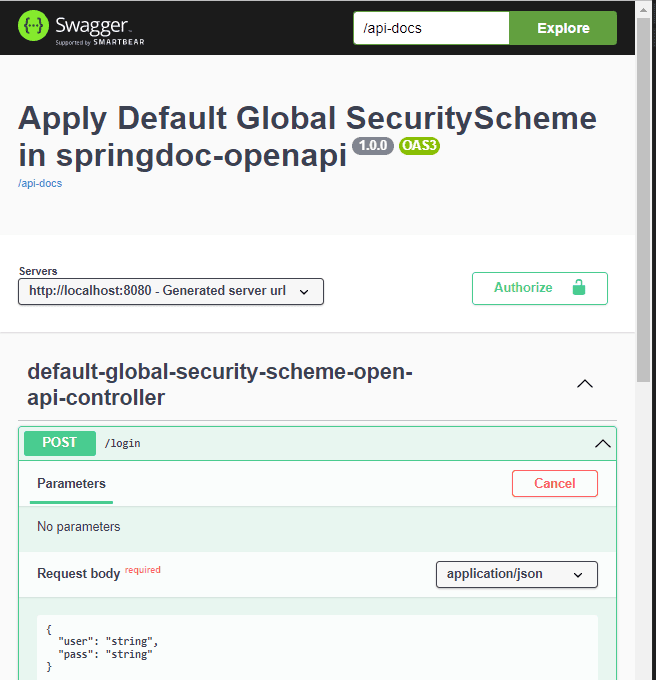
Here we can see what the /login endpoint HTML documentation will look like:
4.2. ping() Method
At this point, we’ll define the ping() method. The ping() method will use the default global security scheme:
|
|
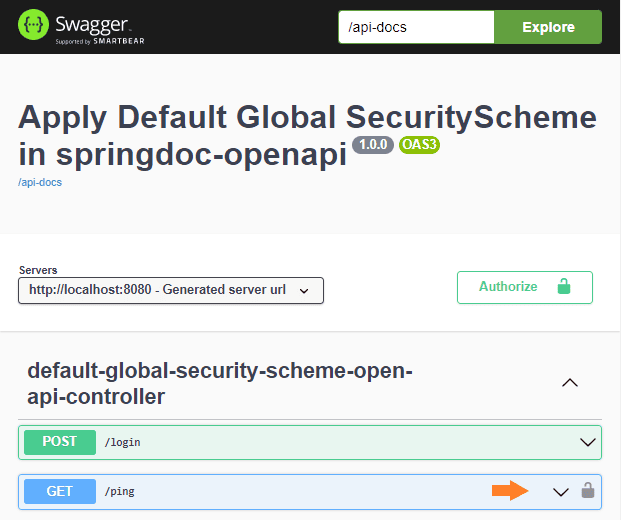
The main difference between the login() and ping() methods is in the security requirement that will be applied. The login() won’t have any security requirement at all, but the ping() method will have the security defined at the API level. So, the HTML documentation will represent the situation showing a lock only for the /ping endpoint:
5. REST API Documentation URLs
At this point, we have the Spring MVC web app ready, and we can start the server:
|
|
Once the server is ready, we can see the HTML documentation, as shown in the previous examples, at the http://localhost:8080/swagger-ui-custom.html URL.
The JSON version of the API definition is found at http://localhost:8080/api-docs and the YAML version at http://localhost:8080/api-docs.yaml.
These outputs can be used to build clients or servers of the API in different languages using the swagger-codegen-maven-plugin.
6. Conclusion
In this article, we’ve learned how to use the springdoc-openapi library to define a default global security scheme. Also, we saw how to apply it as the default security requirement to the API. Furthermore, we’ve learned how to change the default security requirement for a particular endpoint.
Another thing we’ve discovered is that we can automate code generation using the JSON and YAML outputs from the springdoc-openapi.
As usual, the complete source code for this article is available over on GitHub.
Reference https://www.baeldung.com/spring-openapi-global-securityscheme