Role-based access control is a must-have for any application dealing with users who can access resources depending on their organization’s role.
In a previous article, we have learned how to secure our Spring Boot REST API with Keycloak by using the OpenID Connect authentication protocol.
In this article, we are going to build on this sample application and add role-based authorization.
The purpose is to authorize access of some endpoints only to users having a specific role. More precisely, we are going to restrict the DELETE endpoint to only users having the admin role.
Adding a new endpoint
Let’s first extend our Spring Controller by adding a new DELETE endpoint.
|
|
Extending the configuration
Going back to the application.yml file, we specify a new property for the Keycloak configuration.
We set the use-resource-role-mappings property to false.
It means that authorization will be based on Keycloak realm level roles, and not client roles specific to the Spring Boot application.
We do that because the default Keycloak admin role we are using is defined as a realm-level role.
This property is already set to false by default, but I find that setting it explicitly makes it clearer in this context. This is a matter of taste though, so you can skip it if you want.
We also need to make a slight edit to the WebSecurityConfiguration.
|
|
We add a new antMatcher that restricts all routes starting with ‘/plant/’ and using the HTTP DELETE method, which fits the deletePlant endpoint we have added previously.
Note the role mapping is done using the SimpleAuthorityMapper. By default, Spring Security adds a prefix ‘ROLE_’ to any authority, but Keycloak’s roles do not.
By using this mapper, the prefix will be added to any authority sent in the Keycloak token if it is not already here.
Keycloak configuration
We already have the ‘admin’ user from the previous article. This user already has the ‘admin’ role.

We need to create a new user that does not own the admin role.
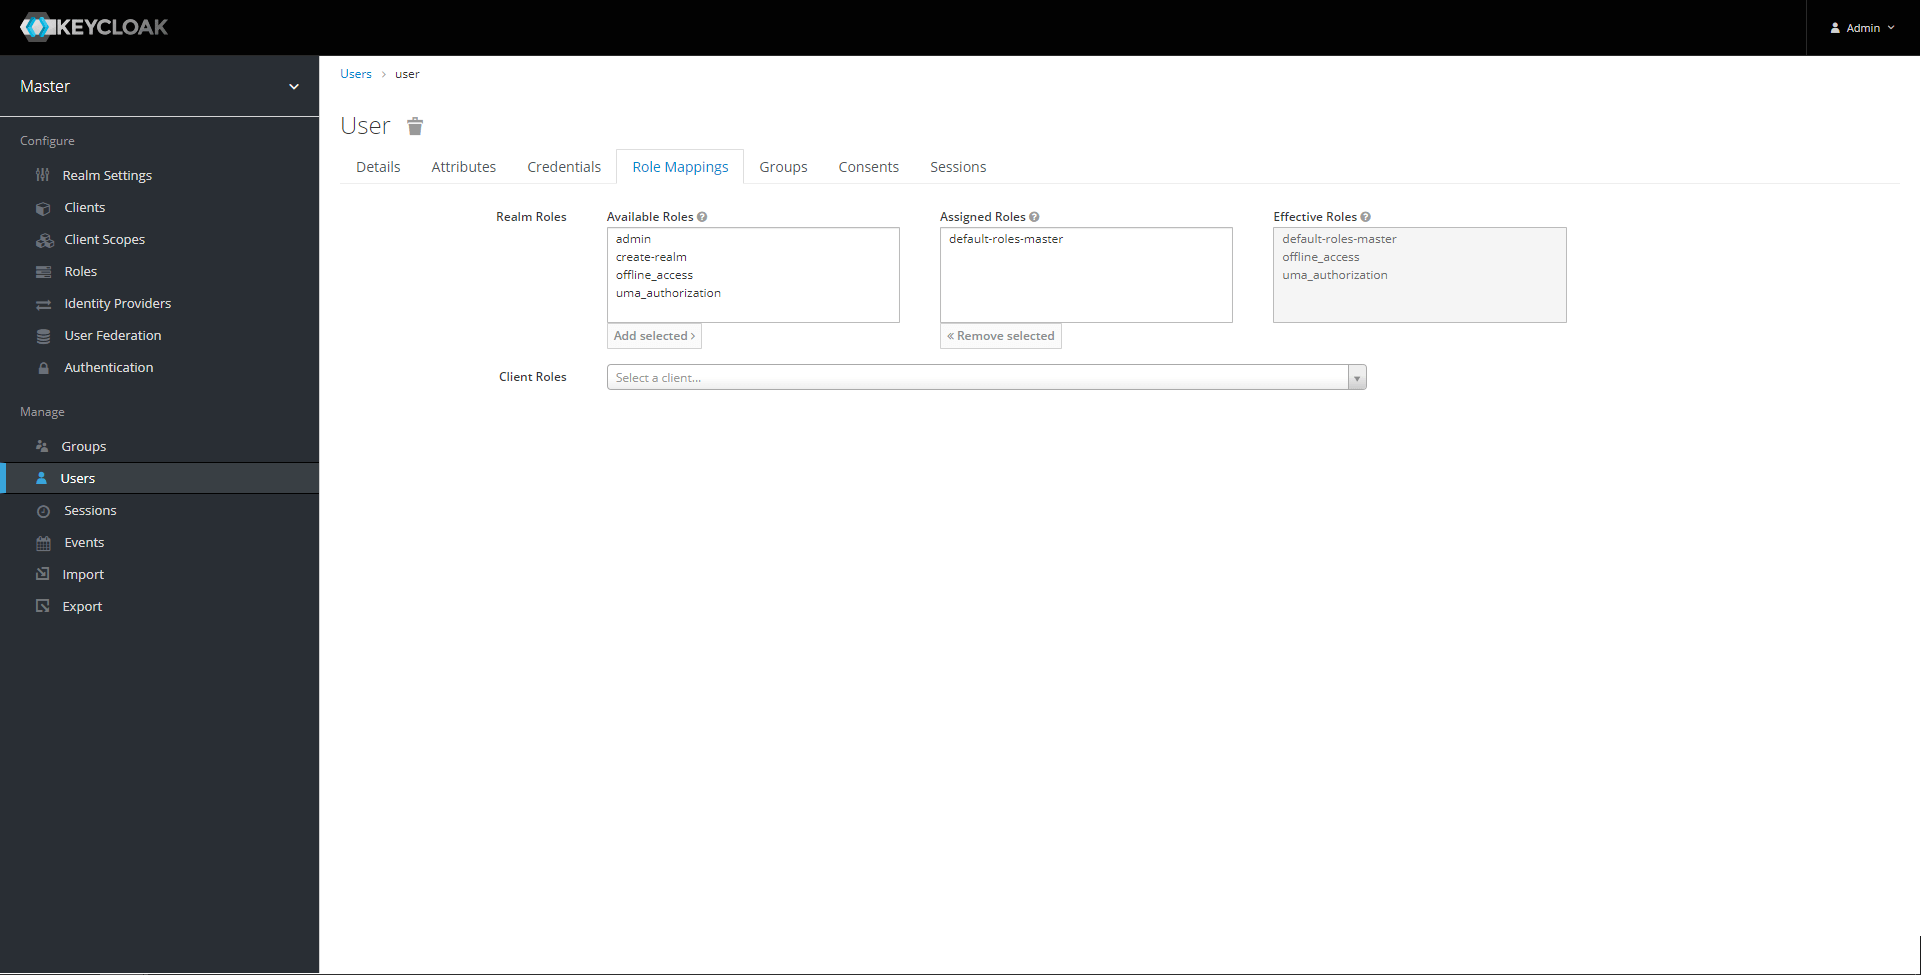
This one will be used to demonstrate that our role-based authorization is working and that the DELETE endpoint will be forbidden for this user.
Testing the application
Let’s first start our application.
|
|
To test our setup, we are going to use the same method as the previous article, and use Postman to play the client role.
We improve our Postman configuration by adding the new user in the variables collection

Let’s first ensure that the ‘user’ with no admin role cannot access the delete endpoint.
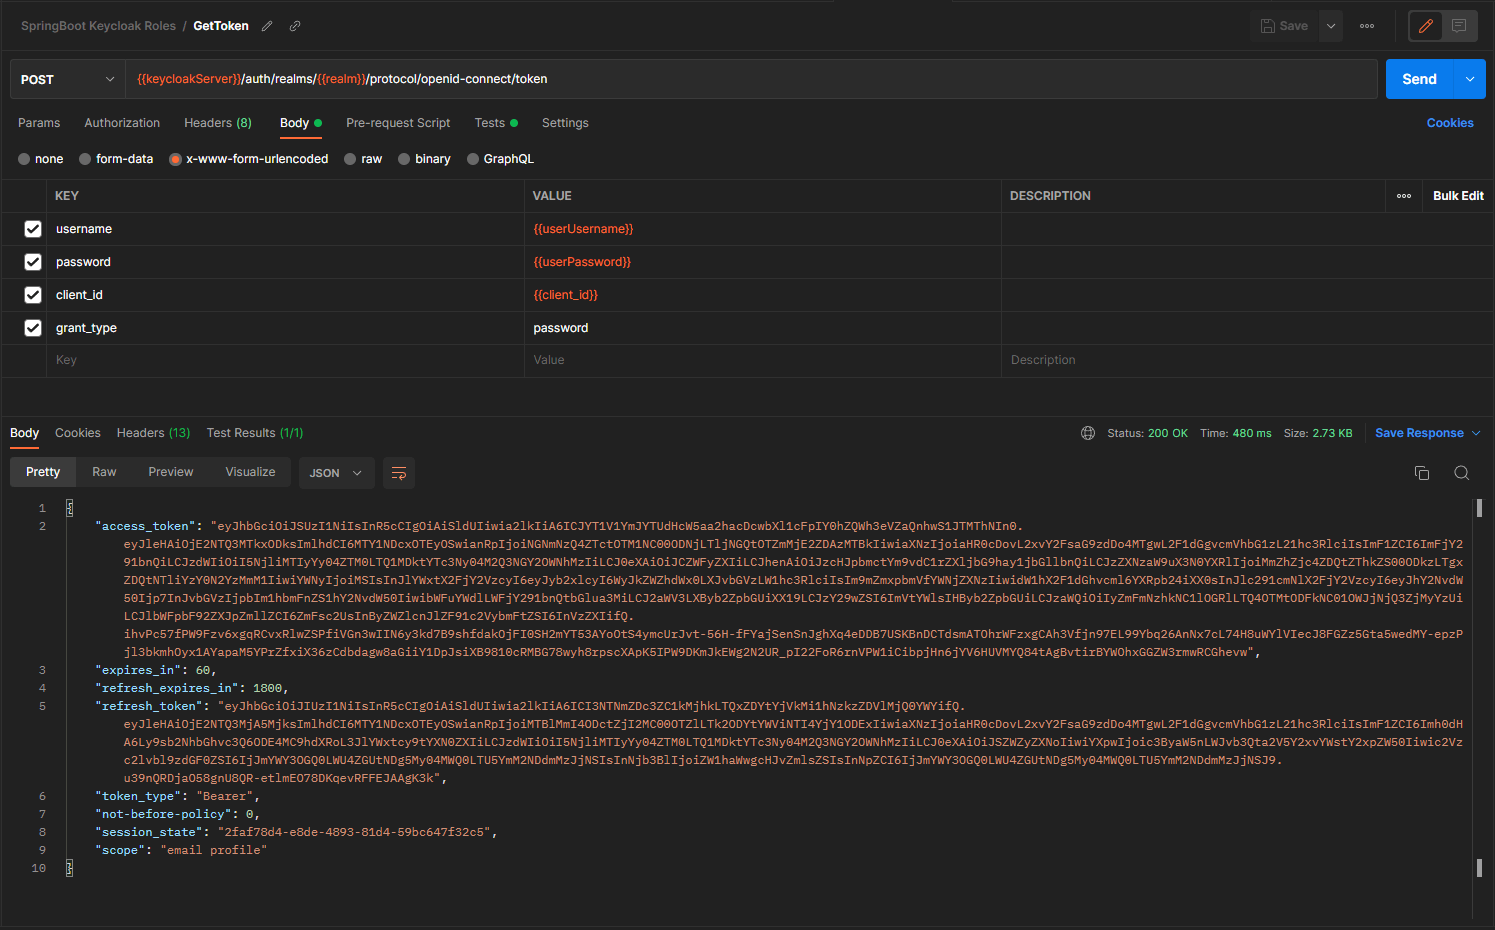
We First fetch the token with the non-admin user.
And let’s try to use the delete endpoint by providing this token in the Authorization header.
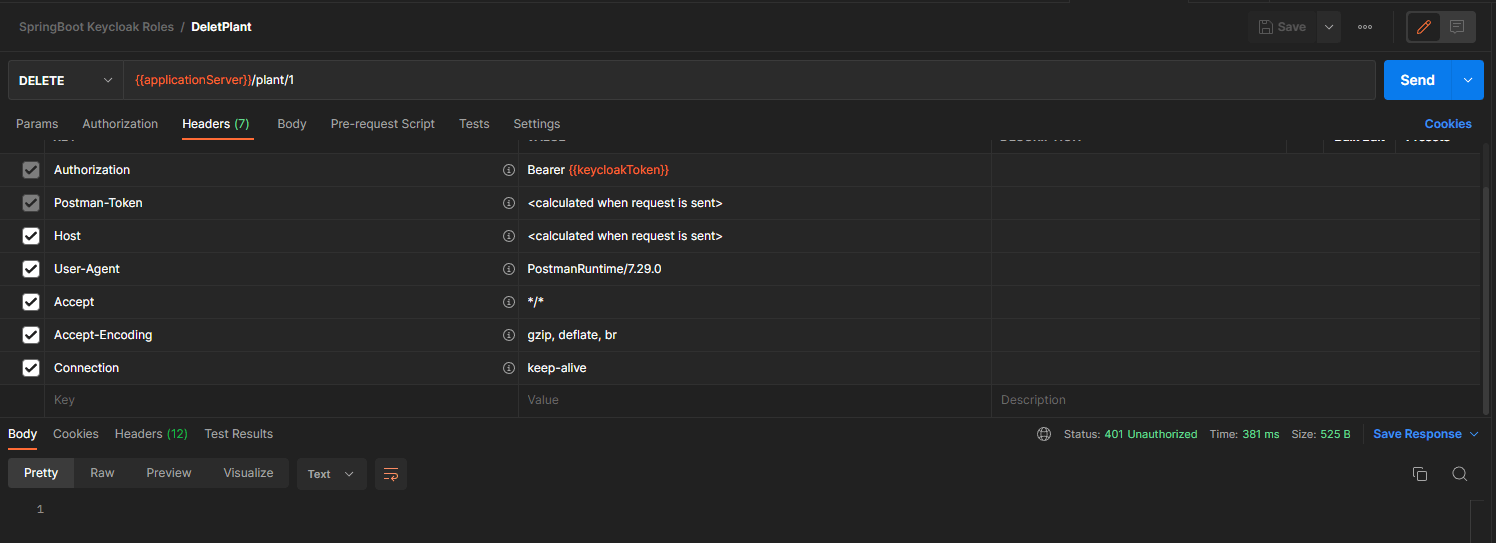
As expected, we receive a 401 Unauthorized error, because the admin role is missing.
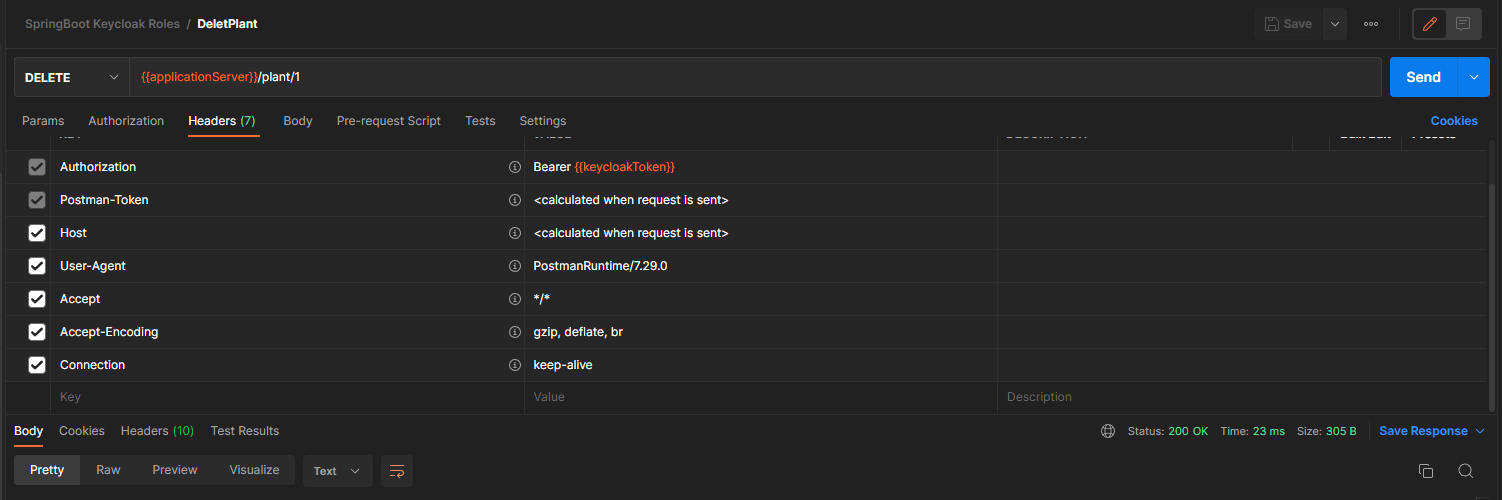
This time around, we get back a new token with the admin user.

The delete endpoint can now be used successfully.
And that’s it! We now have Role-Based Authorization.
Note that since the version 5.7.0 of Spring Security, the WebSecurityConfigurerAdapter is deprecated. It is now advized to use the new configuration type following the component-based design. As of now, the Keycloak Spring Boot Adapter has does not support this new configuration type. I will try to update this article to support this new configuration type as soon as possible.
You can access the demo project for this blog post here https://github.com/Mozenn/spring-boot-keycloak-roles.
Reference https://gauthier-cassany.com/posts/spring-boot-keycloak-roles