tinylog (https://tinylog.org/v2/), like various other things that start with tiny, is a lightweight open source logging solution. It itself contains only two JAR files (one for the API and the other for the implementation) and does not have any external dependencies. The total size of the two JAR files is only 178KB.
Although it is a lightweight level solution , but we commonly used the basic log management features are very complete , it has a similar API design with other popular logging framework , a variety of configurable log output options , performance is also very impressive (this is the official Benchmark (https://tinylog.org/v2/benchmark/).
Today we’ll learn how to use tinylog logging in Spring Boot.
Integration tinylog
This can be summarized in the following steps.
- exclude the default Spring Boot logging framework dependencies
- introduce the logging framework dependencies to be used
- add the configuration file of the new logging framework
Okay, let’s follow this step by step.
Step 1: Exclude Spring Boot default logging framework dependencies
|
|
Step 2: Import tinylog’s dependencies
|
|
Testing and Validation
By now, the basic integration is complete. Let’s not rush to do detailed configuration of tinylog, but first verify that everything is correct up to this point. As in the previous log integration example, write a main class to print the logs at each level.
|
|
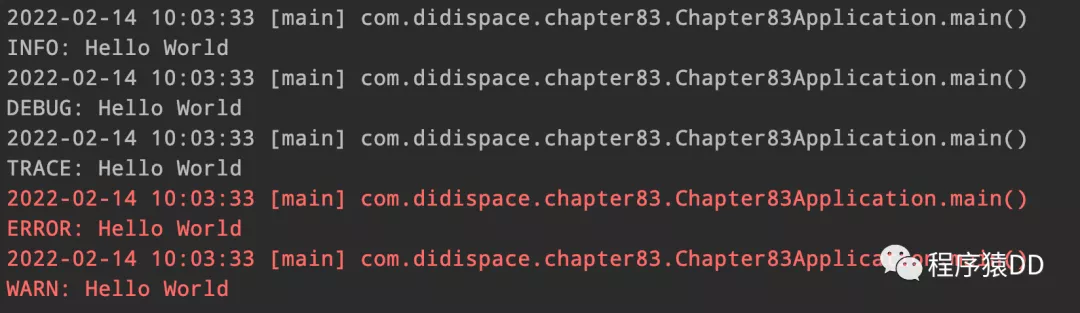
Run it and you will see the following log output from the console.
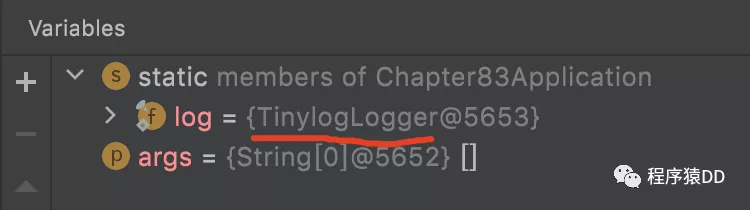
By debugging, we can see that the log implementation is already TinylogLogger at this point.
Step 3: Add the tinylog configuration file
With the previous step, we have completed the integration, but the format above, is it what you want? Add the configuration and adjust it!
Create the file: tinylog.properties in the resources directory and add the following configuration.
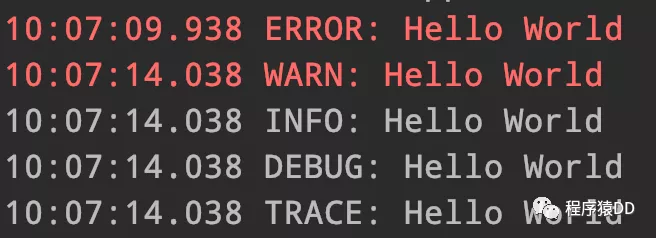
Re-run the test and the console output looks better.
More configuration, such as: file output, level control, etc. Here is not detailed, you can check the official documentation (https://tinylog.org/v2/configuration/), basically with other frameworks are similar, it is easy to configure.