K8S(kubernetes)
Kubernetes is an open source for managing containerized applications on multiple hosts in a cloud platform. The goal of Kubernetes is to make deploying containerized applications simple and efficient (powerful), Kubernetes provides a mechanism for application deployment, planning, updating, and maintenance.
A core feature of Kubernetes is the ability to autonomously manage containers to ensure that the containers in the cloud platform are running according to the user’s expectations (for example, if the user wants to keep apache running, the user does not need to care how to do it, Kubernetes will automatically monitor, then restart, create, in short, keep apache providing services), the administrator can Load a microservice and let the planner find the right place, at the same time, Kubernetes also systematically enhances the tools as well as the user-friendly aspects, so that users can easily deploy their own applications (just like canary deployments).
Spring Cloud Kubernetes
Spring Cloud Kubernetes provides an implementation of the well-known Spring Cloud interface that allows developers to build and run Spring Cloud applications on Kubernetes. While this project may be useful to you when building cloud-native applications, it is not required to deploy Spring Boot applications on Kubernetes. If you are just starting to run Spring Boot applications on Kubernetes, you can do a lot with just a basic Spring Boot application and Kubernetes itself.
Previous spring cloud projects have used eurake as a registry, but if you want to use k8s-specific features when deploying the project to kubernetes, you often don’t get the desired results
I feel that many components in spring cloud and kubernetes are similar, for example, eurake in spring cloud is similar to etcd in k8s, zuul and gateway in spring cloud are similar to ingress or istio in k8s, and config in spring cloud is similar to configmap in k8s. config and k8s configmap, etc. For many similar functional components actually only one can be used, for example, the registration center only needs to use k8s etcd on it, if then eurake deployment in the k8s environment does feel a bit unnecessary
Given that the current deployment environment is kubernetes, in order not to let the components repeat, I decided to transform the spring cloud project into a spring cloud kubernetes project, in order to facilitate, to the previous project spring boot cloud project to transform
Remove eurake registry
Remove the eurake registry and replace it with etcd for kubernetes. Of course, you can’t really connect etcd of kubernetes directly, but use DiscoveryClient for Kubernetes to replace it
That is, you can delete the original eurake project directly. In the previous eurake client project, replace the dependency with the following.
1
2
3
4
5
|
<dependency>
      <groupId>org.springframework.cloud</groupId>
      <artifactId>spring-cloud-starter-kubernetes-client</artifactId>
      <version>2.1.2</version>
</dependency>
|
There are many versions of dependencies on the web mostly for version 1.X. Here we use the official dependencies and do not use Fabric8 dependencies and Fabric8 plugins because we can manually deploy the services without Fabric8 plugins.
It is worth noting here that the eurake service needs to be completely removed, including the client and server services.
Add Controller to the project to test getting the services on K8S.
 1
 2
 3
 4
 5
 6
 7
 8
 9
10
11
12
13
14
15
16
17
18
19
20
21
22
23
24
25
26
27
28
29
30
31
32
33
34
35
36
|
@RestController
public class DiscoveryController {

    @Autowired
    private DiscoveryClient discoveryClient;

    /**
     * 探针检查响应类
     * @return
     */
    @RequestMapping("/health")
    public String health() {
        return "health";
    }

    /**
     * 返回远程调用的结果
     * @return
     */
    @RequestMapping("/getservicedetail")
    public String getservicedetail(
            @RequestParam(value = "servicename", defaultValue = "") String servicename) {
        return "Service [" + servicename + "]'s instance list : " + JSON.toJSONString(discoveryClient.getInstances(servicename));
    }

    /**
     * 返回发现的所有服务
     * @return
     */
    @RequestMapping("/services")
    public String services() {
        return this.discoveryClient.getServices().toString()
                + ", "
                + new SimpleDateFormat("yyyy-MM-dd HH:mm:ss").format(new Date());
    }
}
|
All the following operations are performed in the same level directory.
Build the project with DockerFile.
 1
 2
 3
 4
 5
 6
 7
 8
 9
10
11
12
13
14
15
16
17
18
|
FROM        openjdk:8-jre-alpine

ARG         PREFIX=/opt/java

COPY        /dist/. ${PREFIX}/
COPY        /run.sh ${PREFIX}/
COPY        /version ${PREFIX}/

RUN         ls ${PREFIX}/

RUN         sed -i 's/dl-cdn.alpinelinux.org/mirrors.aliyun.com/g' /etc/apk/repositories \
            && apk add --no-cache bash

WORKDIR     ${PREFIX}
CMD         ["sh", "./run.sh"]


EXPOSE      40300
|
The directory structure of the project.
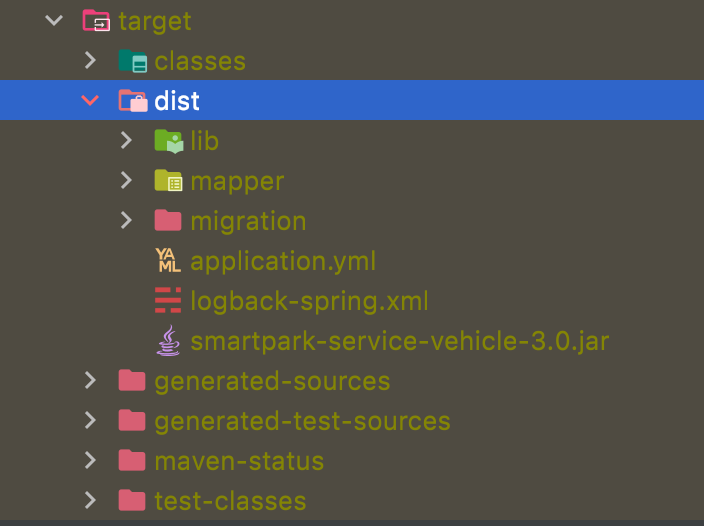
The dist directory is because the Maven packaging method has been modified to extract the lib packages.
  1
  2
  3
  4
  5
  6
  7
  8
  9
 10
 11
 12
 13
 14
 15
 16
 17
 18
 19
 20
 21
 22
 23
 24
 25
 26
 27
 28
 29
 30
 31
 32
 33
 34
 35
 36
 37
 38
 39
 40
 41
 42
 43
 44
 45
 46
 47
 48
 49
 50
 51
 52
 53
 54
 55
 56
 57
 58
 59
 60
 61
 62
 63
 64
 65
 66
 67
 68
 69
 70
 71
 72
 73
 74
 75
 76
 77
 78
 79
 80
 81
 82
 83
 84
 85
 86
 87
 88
 89
 90
 91
 92
 93
 94
 95
 96
 97
 98
 99
100
101
102
103
104
105
106
107
108
109
110
111
112
113
114
115
116
117
118
119
120
121
122
123
124
125
126
127
128
|
       <finalName>${project.artifactId}-${project.version}</finalName>
        <resources>
            <!--指定src/main/resources资源要    过滤-->
            <resource>
                <directory>src/main/resources</directory>
                <filtering>false</filtering>
            </resource>
        </resources>
        <plugins>
            <!-- maven资源文件复制插件 -->
            <plugin>
                <groupId>org.apache.maven.plugins</groupId>
                <artifactId>maven-resources-plugin</artifactId>
                <version>3.1.0</version>
                <executions>
                    <execution>
                        <id>copy-resources</id>
                        <!-- here the phase you need -->
                        <phase>package</phase>
                        <goals>
                            <goal>copy-resources</goal>
                        </goals>
                        <configuration>
                            <outputDirectory>${project.build.directory}/dist/</outputDirectory>
                            <resources>
                                <resource>
                                    <directory>src/main/resources</directory>
                                    <includes>
                                        <exclude>**/*.xml</exclude>
                                        <exclude>**/*.conf</exclude>
                                        <exclude>**/*.properties</exclude>
                                        <exclude>**/*.yml</exclude>
                                        <exclude>**/*.sh</exclude>
                                        <exclude>**/*.keystore</exclude>
                                        <exclude>**/*.txt</exclude>
                                        <exclude>**/*.sql</exclude>
                                    </includes>

                                    <filtering>true</filtering>
                                </resource>
                                <resource>
                                    <directory>src/main</directory>
                                    <includes>
                                        <include>webapp/**</include>
                                    </includes>
                                    <filtering>true</filtering>
                                </resource>
                            </resources>
                            <encoding>UTF-8</encoding>
                            <nonFilteredFileExtensions>
                                <nonFilteredFileExtension>keystore</nonFilteredFileExtension>
                                <nonFilteredFileExtension>cer</nonFilteredFileExtension>
                                <nonFilteredFileExtension>woff</nonFilteredFileExtension>
                                <nonFilteredFileExtension>eot</nonFilteredFileExtension>
                                <nonFilteredFileExtension>ttf</nonFilteredFileExtension>
                                <nonFilteredFileExtension>svg</nonFilteredFileExtension>
                                <nonFilteredFileExtension>xls</nonFilteredFileExtension>
                                <nonFilteredFileExtension>xlsx</nonFilteredFileExtension>
                                <nonFilteredFileExtension>key</nonFilteredFileExtension>
                            </nonFilteredFileExtensions>
                        </configuration>

                    </execution>
                </executions>
            </plugin>
            <!-- 依赖包插件 -->
            <plugin>
                <groupId>org.apache.maven.plugins</groupId>
                <artifactId>maven-dependency-plugin</artifactId>
                <executions>
                    <execution>
                        <id>copy-dependencies</id>
                        <phase>prepare-package</phase>
                        <goals>
                            <goal>copy-dependencies</goal>
                        </goals>
                        <configuration>
                            <outputDirectory>${project.build.directory}/dist/lib</outputDirectory>
                            <!-- 是否不包含间接依赖 -->
                            <excludeTransitive>false</excludeTransitive>
                            <!-- 忽略版本 -->
                            <stripVersion>false</stripVersion>
                            <overWriteReleases>false</overWriteReleases>
                            <overWriteSnapshots>false</overWriteSnapshots>
                            <overWriteIfNewer>true</overWriteIfNewer>
                        </configuration>
                    </execution>
                </executions>
            </plugin>
            <plugin>
                <groupId>org.apache.maven.plugins</groupId>
                <artifactId>maven-jar-plugin</artifactId>
                <version>3.2.0</version>
                <configuration>
                    <archive>
                        <addMavenDescriptor>false</addMavenDescriptor>
                        <!--不打包依赖的jar,把依赖的jar copy到lib目录,和生成的jar放在同一级目录下-->
                        <manifestEntries>
                            <Class-Path>.</Class-Path>
                        </manifestEntries>
                        <manifest>
                            <addClasspath>true</addClasspath>
                            <classpathPrefix>lib/</classpathPrefix>
                            <mainClass>${main.class}</mainClass>
                        </manifest>
                    </archive>
                    <excludes>
                        <exclude>**/*.xml</exclude>
                        <exclude>**/*.conf</exclude>
                        <exclude>**/*.properties</exclude>
                        <exclude>**/*.yml</exclude>
                        <exclude>**/*.sh</exclude>
                        <exclude>**/*.keystore</exclude>
                        <exclude>**/*.txt</exclude>
                        <exclude>**/*.sql</exclude>
                    </excludes>
                    <outputDirectory>${project.build.directory}/dist</outputDirectory>
                </configuration>
            </plugin>
            <plugin>
                <groupId>org.apache.maven.plugins</groupId>
                <artifactId>maven-surefire-plugin</artifactId>
                <version>2.18.1</version>
                <configuration>
                    <skip>true</skip>
                    <skipTests>true</skipTests>
                </configuration>
            </plugin>
|
As for run.sh and version, they are only for starting the service
version:
1.0.0
run.sh:
 1
 2
 3
 4
 5
 6
 7
 8
 9
10
11
12
13
14
15
16
17
18
19
20
21
22
23
24
25
26
27
28
29
30
31
32
33
34
35
36
37
38
39
40
41
|
# !/bin/sh

trap 'kill -TERM $PID'  TERM INT

# Uncomment below lines if the SVC is the owner of DB
#echo "Running migrations ..."
#for i in $(seq 1 30); do
#    ./migrations/bin/migrate up > /dev/null 2>&1
#    [ $? = 0 ] && break
#    echo "Reconnecting db $i ..." && sleep 1
#done
#
#[ $? != 0 ] && echo "Failed to connect db, aborted!" && sleep 1 && exit 1

if [ -f javaopt.conf ]; then
  source javaopt.conf
fi

MSMEM=${MSMEM:-1024m}
MXMEM=${MXMEM:-1024m}
# Set it in javaopt.conf if needed
# CLASS=${ENTRY_CLASS:-com.linktopa.app.main}

export VERSION=`cat version`_$REV

echo "Starting service [$VERSION] ..."
java -javaagent:/opt/java/lib/core-x-2.0.3.jar ${JAVA_OPTS} -Xms$MSMEM -Xmx$MXMEM \
        -Djava.security.egd=file:/dev/./urandom \
        -Duser.timezone=GMT+8 \
        -Dglobal.config.path=/opt/java \
        -jar `ls /opt/java/*-*.jar` $CLASS


tail -f /dev/null &
PID=$!
# Now blocking ...
wait ${PID}

# Here a TERM/INT signal must be received
trap - TERM INT
echo "Service exited!"
|
Use Dockerfile to build the image.
1
|
docker build -f Dockerfile -t vehcloud:1.0.0 .
|
Write the kubernetes deployment file.
 1
 2
 3
 4
 5
 6
 7
 8
 9
10
11
12
13
14
15
16
17
18
19
20
21
22
23
24
25
26
27
28
29
30
31
32
33
34
35
36
37
38
39
40
41
42
43
44
45
46
47
48
49
50
51
|
apiVersion: apps/v1  #kubectl api-versions 可以通过这条指令去看版本信息
kind: Deployment # 指定资源类别
metadata: #资源的一些元数据
  name: ent-cloud-k8s #deloyment的名称
  labels:
    app: ent-cloud-k8s  #标签
spec:
  replicas: 1 #创建pod的个数
  selector:
    matchLabels:
      app: ent-cloud-k8s #满足标签为这个的时候相关的pod才能被调度到
  template:
    metadata:
      labels:
        app: ent-cloud-k8s
    spec:
      nodeSelector:
        kubernetes.io/hostname: "210node"
      containers:
        - name: ent-cloud-k8s
          image: entcloud:1.0.1
          imagePullPolicy: IfNotPresent #当本地有镜像的时候优先选用本地,没有才选择网络拉取
          ports:
            - containerPort: 40900 #开放8080

---
apiVersion: v1
kind: Service
metadata:
  labels:
    app: ent-cloud-k8s
  name: ent-cloud-k8s
spec:
  ports:
  - name: "40900"
    port: 40900
    targetPort: 40900
  type: NodePort
  selector:
    app: ent-cloud-k8s #满足标签为这个的时候相关的pod才能被调度到

---
kind: ClusterRole
apiVersion: rbac.authorization.k8s.io/v1
metadata:
     namespace: default
     name: service-reader
rules:
- apiGroups: [""]
  resources: ["services", "endpoints", "pods"]
  verbs: ["get", "list", "watch"]
|
Execute the K8S deployment command.
1
|
kubectl create -f ./k8s-boot-app-deployment.yml
|
One of the most critical issues is the configuration of user roles.
After the deployment, you need to execute the following commands.
1
|
kubectl create clusterrolebinding service-reader-pod --clusterrole=service-reader --serviceaccount=default:default
|
Complete the user role permissions.
Here is a little different from the official one that needs some attention.
 1
 2
 3
 4
 5
 6
 7
 8
 9
10
11
12
13
14
15
16
17
18
19
20
21
22
23
24
25
|
kind: Role
apiVersion: rbac.authorization.k8s.io/v1
metadata:
  namespace: YOUR-NAME-SPACE
  name: namespace-reader
rules:
  - apiGroups: [""]
    resources: ["configmaps", "pods", "services", "endpoints", "secrets"]
    verbs: ["get", "list", "watch"]

---

kind: RoleBinding
apiVersion: rbac.authorization.k8s.io/v1
metadata:
  name: namespace-reader-binding
  namespace: YOUR-NAME-SPACE
subjects:
- kind: ServiceAccount
  name: default
  apiGroup: ""
roleRef:
  kind: Role
  name: namespace-reader
  apiGroup: ""
|
This is where the account permissions are added to the official website.
Because we must have get , list and permissions for the following resources: watch.
1
|
["configmaps", "pods", "services", "endpoints", "secrets"]
|
Only then can you access the services on K8S.
After that, you can access the services deployed on K8S.
You can check the service status with a simple command.
 1
 2
 3
 4
 5
 6
 7
 8
 9
10
11
12
13
14
15
|
kubectl create -f ./k8s-boot-app-deployment.yml #部署k8s应用

kubectl get deployments #查看deployment信息

kubectl expose deployment k8s-boot-app-deployment --type=NodePort #开放端口访问

kubectl get services #查看services信息,如端口映射情况

kubectl delete service nginx-service #删除service

kubectl get pods #获取部署的prod列表信息

kubectl logs -f springboot-k8s-template-deployment-687f8bf86d-lcq5p #查看某个pod的日志

kubectl delete -f ./k8s-boot-app-deployment.yml #删除服务
|
Access the interface to get a list of service names.
1
|
[kubernetes, veh-cloud-k8s], 2022-05-26 15:46:24
|
Get service details.
 1
 2
 3
 4
 5
 6
 7
 8
 9
10
11
12
13
14
15
|
Service [veh-cloud-k8s]'s instance list :
[
    {
        "host":"10.100.96.60",
        "instanceId":"a129eab0-c58d-4fdb-adc9-7670370820bc",
        "metadata":{
            "app":"veh-cloud-k8s"
        },
        "port":40300,
        "scheme":"http",
        "secure":false,
        "serviceId":"veh-cloud-k8s",
        "uri":"http://10.100.96.60:40300"
    }
]
|
Spring Cloud Feign
When the project is deployed to K8S, the next step is to make remote calls between services, for which we also need to make some changes to the pom dependencies and the project.
Earlier Spring-Cloud-Kubernetes used ribbon to do load balancing between services, but the new version of Spring-Cloud-Kubernetes uses loadbalancer to do a load balancing instead.
It is worth noting that the ribbon needs to be removed for the OpenFeign dependency to work.
 1
 2
 3
 4
 5
 6
 7
 8
 9
10
|
<dependency>
    <groupId>org.springframework.cloud</groupId>
    <artifactId>spring-cloud-starter-openfeign</artifactId>
    <exclusions>
        <exclusion>
            <groupId>org.springframework.cloud</groupId>
            <artifactId>spring-cloud-netflix-ribbon</artifactId>
        </exclusion>
    </exclusions>
</dependency>
|
Use official dependencies.
1
2
3
4
5
|
<dependency>
    <groupId>org.springframework.cloud</groupId>
    <artifactId>spring-cloud-starter-kubernetes-client-loadbalancer</artifactId>
    <version>2.1.2</version>
</dependency>
|
To enable load balancing based on the Kubernetes service name, use the following properties. The load balancer will then try to invoke the application using an address such as service-a.default.svc.cluster.local
You can add a configuration to application.yml.
1
2
3
4
5
|
Spring:
  cloud:
    kubernetes:
      loadbalancer:
        mode: service
|
In the official code it is possible to choose pod and service.
 1
 2
 3
 4
 5
 6
 7
 8
 9
10
11
12
13
14
15
16
17
|
/**
 * Kubernetes load balancer mode enum.
 *
 * @author Piotr Minkowski
 */
public enum KubernetesLoadBalancerMode {

    /**
        * using pod ip and port.
        */
    POD,
    /**
        * using kubernetes service name and port.
        */
    SERVICE

}
|
Looking at the source code of spring cloud kubernetes, we can see that the default mode of loadbalancer is the POD method.
1
2
3
4
5
|
/**
    * {@link KubernetesLoadBalancerMode} setting load balancer server list with ip of pod
    * or service name. default value is POD.
    */
private KubernetesLoadBalancerMode mode = KubernetesLoadBalancerMode.POD;
|
The main difference between the pod approach and the service approach is:
The service method of load balancing requests a service directly from the corresponding service (svc) in the kubernetes cluster.
In the pod approach, the service caller first obtains the pod list of the corresponding service by calling the kubernetes api, and then saves it to a list and requests it using the loadbalancer load balancing policy configured by the spring cloud project.
In other words, when the load balancing mode is service, the loadbalance configuration configured in the spring cloud project is invalid because it will be accessed through the service in k8s. When the loadbalance mode is pod, the loadbance configuration in the spring cloud project can be used for load.
The service approach (load-balancing pressure on the k8s side).
The pod approach (load balancing is done on the spring cloud project side).
As for the specific choice, you need to choose according to the project situation.
Generally speaking, if the k8s cluster has more resources for convenience, choose the service method.
If you want to be more flexible and reduce some of the pressure on the k8s cluster, you can choose the pod method.
To enable load balancing across all namespaces, use the following properties. spring-cloud-kubernetes-discovery.
1
|
spring.cloud.kubernetes.discovery.all-namespaces=true
|
load balancing pod and servcie style smooth access:
Smooth access to services in servcie mode
If the spring cloud kubernetes project is configured in the servcie mode, to achieve smooth access to the service, its main configuration of the pod’s two probes can be, they are.
- readinessProbe
- survivabilityProbe
Specifically, you can see the following spring boot official instructions, the link is as follows.
https://docs.spring.io/spring-boot/docs/2.5.3/reference/htmlsingle/#actuator.endpoints.kubernetes-probes
Make changes to Feign in the project.
1
2
3
4
|
@FeignClient(name = "ent-cloud-k8s")
public interface EnterpriseClient {
     .........
}
|
The name here is the name of another service that you defined when the project was deployed.
Modify Controller to test it.
 1
 2
 3
 4
 5
 6
 7
 8
 9
10
11
12
13
14
15
16
17
18
19
20
21
22
23
24
25
26
27
28
29
30
31
32
33
34
35
36
37
38
39
40
41
42
43
44
45
46
47
48
49
50
51
52
53
54
55
56
57
58
59
60
61
62
63
64
65
|
@RestController
public class DiscoveryController {

    @Autowired
    private DiscoveryClient discoveryClient;

    @Autowired
    @Qualifier("restTemplates")
    private RestTemplate restTemplate;

    @Autowired
    private EnterpriseClient enterpriseClient;

    /**
     * 探针检查响应类
     * @return
     */
    @RequestMapping("/healths")
    public String health() {
        String responseEntity = enterpriseClient.getenterpriseinfo();
        JSONObject JSObject = JSON.parseObject(responseEntity);
        return JSObject.getString("data");
    }


    @RequestMapping("/ent")
    public String demo() {
        String url="http://ent-cloud-k8s:40900/enterprise/enterprise/info/base/info";
        System.out.println(url);
        String forObject = restTemplate.getForObject(url, String.class);
        System.out.println(forObject);
        return forObject;
    }

    /**
     * 返回远程调用的结果
     * @return
     */
    @RequestMapping("/getservicedetail")
    public String getservicedetail(
            @RequestParam(value = "servicename", defaultValue = "") String servicename) {
        try {
            List<ServiceInstance> instances = discoveryClient.getInstances(servicename);
            System.out.println("Service [" + servicename + "]'s instance list : " + JSON.toJSONString(discoveryClient.getInstances(servicename)));
            String url = instances.get(0).getUri() + "/enterprise/enterprise/info/base/info";
            System.out.println(url);
            String forObject = restTemplate.getForObject(url, String.class);
            System.out.println(forObject);
        }catch (Exception e){
            System.out.println(e.getMessage());
        }
        return "Service [" + servicename + "]'s instance list : " + JSON.toJSONString(discoveryClient.getInstances(servicename));
    }

    /**
     * 返回发现的所有服务
     * @return
     */
    @RequestMapping("/services")
    public String services() {
        return this.discoveryClient.getServices().toString()
                + ", "
                + new SimpleDateFormat("yyyy-MM-dd HH:mm:ss").format(new Date());
    }
}
|
Repackage and deploy according to the above deployment file to access the interfaces of other projects.
Official website:
https://docs.spring.io/spring-cloud-kubernetes/docs/current/reference/html/#why-do-you-need-spring-cloud-kubernetes
Reference http://www.enmalvi.com/2022/05/27/springcloud-spring-cloud-kubernetes/